Saturday, February 27, 2016
Another Quilt of Valor
ok, this one stumped me for awhile. Wasn't sure what to do with it. The lady who pieced it did an amazing job! The pineapple center is 1/2" paper pieced. Lots of work. She even matched the white on white stripes in the white squares. So with all that work, there was no way it was going to just have a simple all over pattern!
So, I stitched in the ditch around the red pineapples, this allowed them to pop up and the blue flag pineapples also.
In the center white squares I placed a star to match the stars in the white border.
The red and cream striped border with black servicemen, I stitched next to the stripes.
The borders with the writing, I just squiggled since you would not see anything anyway.
The blue borders were different sized on the top and sides so I made the centers 4" to accommodate
the continuous freeform feathers and added straight lines to the edges.
When finished I was very pleased with the effect.
Sunday, February 21, 2016
Hexi Quilt
This darling Hexi was pieced by owner Lola B. When Lola showed me the top she pieced, I loved it! Couldn't wait to quilt it.
She brought a very thin batting of 90% cotton and 10% poly. I added a layer of Hobbs 80/20 to get the definition as shown.
We both opted for a lavender Glide thread which looks awesome.
After looking at this for awhile, it dawned on me, The wide border matches the bedspread in my guest bedroom!
The entire top is quilted free motion.
This is the back of the quilt. The lavender thread
really shows off the quilting. Although it does not show, the backing fabric actually has a hint of yellow in it. Think she could hang it this side if so desired!! So cute!
What do you think?
Thursday, February 11, 2016
Treasure Challenge of 2016
So that said this is my "treasure" top. pieced by hand. Most of the pieces are on the bias and they are stretched.
you can see the pieces are hand stitched in this picture.
Pictures of the progress will be posted as I work on this intermittently. This project will be a process. It will be entered in a special category at this comming Falls WSQ show in Spokane, Washington. Wish me luck.
Friday, January 29, 2016
Quilt of Valor for January
Lots of ruler work in this one! I used thequiltedpineapple.com 20" curved ruler in the sashing to create a second design.Then feathered in the center of the sashing design and the center of the blocks to unite the feathers. Like the look of this quilt. My wish is the person who receives it will enjoy their quilt. I know I gained a lot of pleasure in the quilting of this treasure.
Sunday, December 6, 2015
My Sampler Quilt
![]() |
| Drawing the feathers. |
I am using two layers of batting. Hobbs 80/20 on the bottom and a Hobbs white polyester medium thickness on top as the quilt top is white. Using two layers gives a great definition to your quilting.
Before the feathers, I stitch in the ditch around every block using a 60 wt thread. All stitching in the white areas is done with Glide thread. Color used is called Linen. For the colored areas I chose Affinity thread in aquamarine. It's a variegated and looks metallic. I used the 8" curved ruler from my new set purchased from thequiltedpineapple.com Love the rulers. I also love my "littleone" straight ruler from deloasquilts.com. Took her class at MQX in Portland, Oregon BEFORE I purchased my long arm. So glad I did that! She gives a great class. 
Tuesday, November 24, 2015
Monday, October 19, 2015
Ribbons
Spring Garden Quilt received a 2nd place ribbon at our local fair.
It also received an Honorable mention for Machine quilting Excellence at the Spokane Quilt Show.
Thursday, October 15, 2015
Monday, October 12, 2015
Quilt of Valor
The lady who designed this quilt top did an amazing job. Everything was beautifully square. Trimed and pressed beautifully. THankyou. Made it easy to quilt..
Loving ruler work. I preceded to stitch in the ditch and add the patterns. Love how it came out.
I hope the veteran enjoys their wonderful quilt.
Over all view of the quilt. Love the yellow gold with the red and blue. Really enjoyed quilting this one.
Loving ruler work. I preceded to stitch in the ditch and add the patterns. Love how it came out.
I hope the veteran enjoys their wonderful quilt.
Over all view of the quilt. Love the yellow gold with the red and blue. Really enjoyed quilting this one.
Wednesday, September 30, 2015
Tablecloth to Quilt. A "treasure" challenge.
I belong to a wonderful longarm group called, INMQ. Stands for Inland Northwest Machine Quilters.
The group purchased antique and old unfinished quilt tops from many sources. Included were two tablecloths. Of which one I recieved. (Yea!) The challenge was to transform our tops to hopefully quilting masterpieces. The only thing allowed was actually quilting. No other embellishments allowed. Because of the lace inserts, a lining was allowed under the top.
After auditioning several colors, I decided on pink. Since the top was feminine anyway might as well go with it!
This is a close up of one side of tablecloth on top of pink fabric.
After pinning the entire top to the underlay and making sure everything was laying smoothly, it was off to the sewing machine to stitch it all together. This was a very time consuming project!
It took lots of pins!
Falling in Love with this fabric!
When It was purchased, I didn't know if the colors would match well or if I was adding 7 yards to my stash! I just knew I had to have it. You know how that goes. Thought it would make a pretty backing for the tablecloth quilt. Then a person could always flip the quilt over for a different look.
So, after drawing up a few ideas, it was time to load this project onto my wonderful A1 premium elite long arm.
I rolled to the center and quilted away. Using Glide thread in a pale pink.
I preceded to quilt the beginnings of a lot of curved crosshatching. And I do mean a lot. Using my new rulers from "The Quilted Pineapple". The idea was to give the quilt a more "Victorian" Feel.
So much space to cover. What to do next? I know, I'll make some more feathers! ha.
The group purchased antique and old unfinished quilt tops from many sources. Included were two tablecloths. Of which one I recieved. (Yea!) The challenge was to transform our tops to hopefully quilting masterpieces. The only thing allowed was actually quilting. No other embellishments allowed. Because of the lace inserts, a lining was allowed under the top.
After auditioning several colors, I decided on pink. Since the top was feminine anyway might as well go with it!
This is a close up of one side of tablecloth on top of pink fabric.
After pinning the entire top to the underlay and making sure everything was laying smoothly, it was off to the sewing machine to stitch it all together. This was a very time consuming project!
It took lots of pins!
Falling in Love with this fabric!
When It was purchased, I didn't know if the colors would match well or if I was adding 7 yards to my stash! I just knew I had to have it. You know how that goes. Thought it would make a pretty backing for the tablecloth quilt. Then a person could always flip the quilt over for a different look.
So, after drawing up a few ideas, it was time to load this project onto my wonderful A1 premium elite long arm.I rolled to the center and quilted away. Using Glide thread in a pale pink.
So much space to cover. What to do next? I know, I'll make some more feathers! ha.
Friday, September 18, 2015
Thursday, May 7, 2015
Pineapple Log Cabin Finished.
Seems awhile since last posting anything. It's been busy around here with spring in the air. Lots of gardening going on. But the Pineapple log cabin is finished. Just have to sew on the binding. The entire
quilt was all ruler work. I am pleased how it turned out. Also the drape and feel of the quilt is wonderful. I used a bottom layer of Hobbs 80/20 with a top layer of Hobbs Tuscany Wool. If anything it will be cozy warm!
I took a picture of the upper corner border so when it came to the bottom corners they would be the same.
All the stitch in ditch work used a black sew fine thread on top. The borders used purple glide thread.
The backside was a cream Glide throughout. No tension problems at all. Yea.
Love the back too!. So spring looking. It's a Hoffman fabric. Makes for a quick change on the bed just by turning the quilt to the back side. Looking at this picture you would never guess this was a printed panel!! Awesome.
Friday, April 24, 2015
What was i thinking? Not!
Day before yesterday the morning was spent putting together a quilt top that I purchased the fabric for close to twenty-five years ago. My how time flys.
So yesterday, a road trip to town was in order. It takes me 45 minutes to drive into town. Remember, I live in the forest!
Almost three hours in two stores, were spent trying to find backing fabric to co-ordinate with this top before giving up!
So this morning I made another trip. This time to the local quilt shop. Now It is a very beautiful store with quality fabrics. But the prices are up there. So I found a very pretty print that is in the same color ways as the front. Just a little different. But I figured it is going on my bed and it would be fun to have a different look by just flipping the quilt. So I purchased my fabric (ouch!) and drove home.
Just as I'm ready to turn onto my road it hits me, Oh no, my quilt is 98" wide and my fabric is only 44" wide, times 2 = 88" wide. Dang!! Talk about being disgusted with myself.
So it's been figured out I need another 1.33 yards at $19.00. Which means it will be pieced / patched on the back. Bummer. Otherwise it is another $42.00 and that is just way to much for backing.
Maybe the quilting will hide it. Let's hope.
I will show the quilt in a few days.
Remember When?
| Do you remember in the 90"s when Burgundy was all the rage for bedroom decor? Well my sister made the top over 20 years ago at a Mystery Retreat, then put it away! I used Hobbs 80/20 with a top layer of Hobbs 8.8 poly batt to give it a very puffy look she likes. Every piece was stitched in the ditch with sew fine thread. the decorative stitches were done with Glide in an aqua color. Now at least she will be able to enjoy her creation. Only 20 years later! o ![]() |
| Finished with a 1/2" binding |
![]() |
| Center Medallion |
It looks pretty layer out on my cutting table.
![]() |
| The back |
Saturday, March 21, 2015
It's off the frame!
I am doing the happy dance! Very big smile across my face! I am blown away how awesome this quilt turned out.. quilting this quilt was pure pleasure for me. I am glad to have it off the frame but at the same time, will miss the quilting on it! ( guess that's why there is another one always in the works.
Sewing the prairie points on now. Then there are buttons to sew on also. Yea. a new wall hanging just in time for spring!
I kept track of my time quilting. It came to 25.5 hours! Soo worth it! Seven hours of it was stitching in the ditch and around every appliqué.
Sewing the prairie points on now. Then there are buttons to sew on also. Yea. a new wall hanging just in time for spring!
Finished!
Trying to get it all finished by the next quilt guild meeting to share. Should be interesting to see what the response is.
I kept track of my time quilting. It came to 25.5 hours! Soo worth it! Seven hours of it was stitching in the ditch and around every appliqué. Thursday, March 12, 2015
Wednesday, March 11, 2015
First panel quilted!
![]() |
| After stitching in the ditch work and stitching around every appliqué, six hours worth, It's time to begin! The quilting on the Ohio Stars looks like flowers. |
![]() |
| The beginning! Started at the bottom by pebbling and then random quilting. So excited to be this far. |
![]() |
| I've taken pictures so when I get to the opposite side I will have a reference to match somewhat. |
![]() |
| You can see I am staying away 3/4" from the edge. Need that much room to attach the special edging. |
![]() |
| Having a variety in the quilting makes it interesting. |
Wednesday, March 4, 2015
Garden Quilt ready to load.
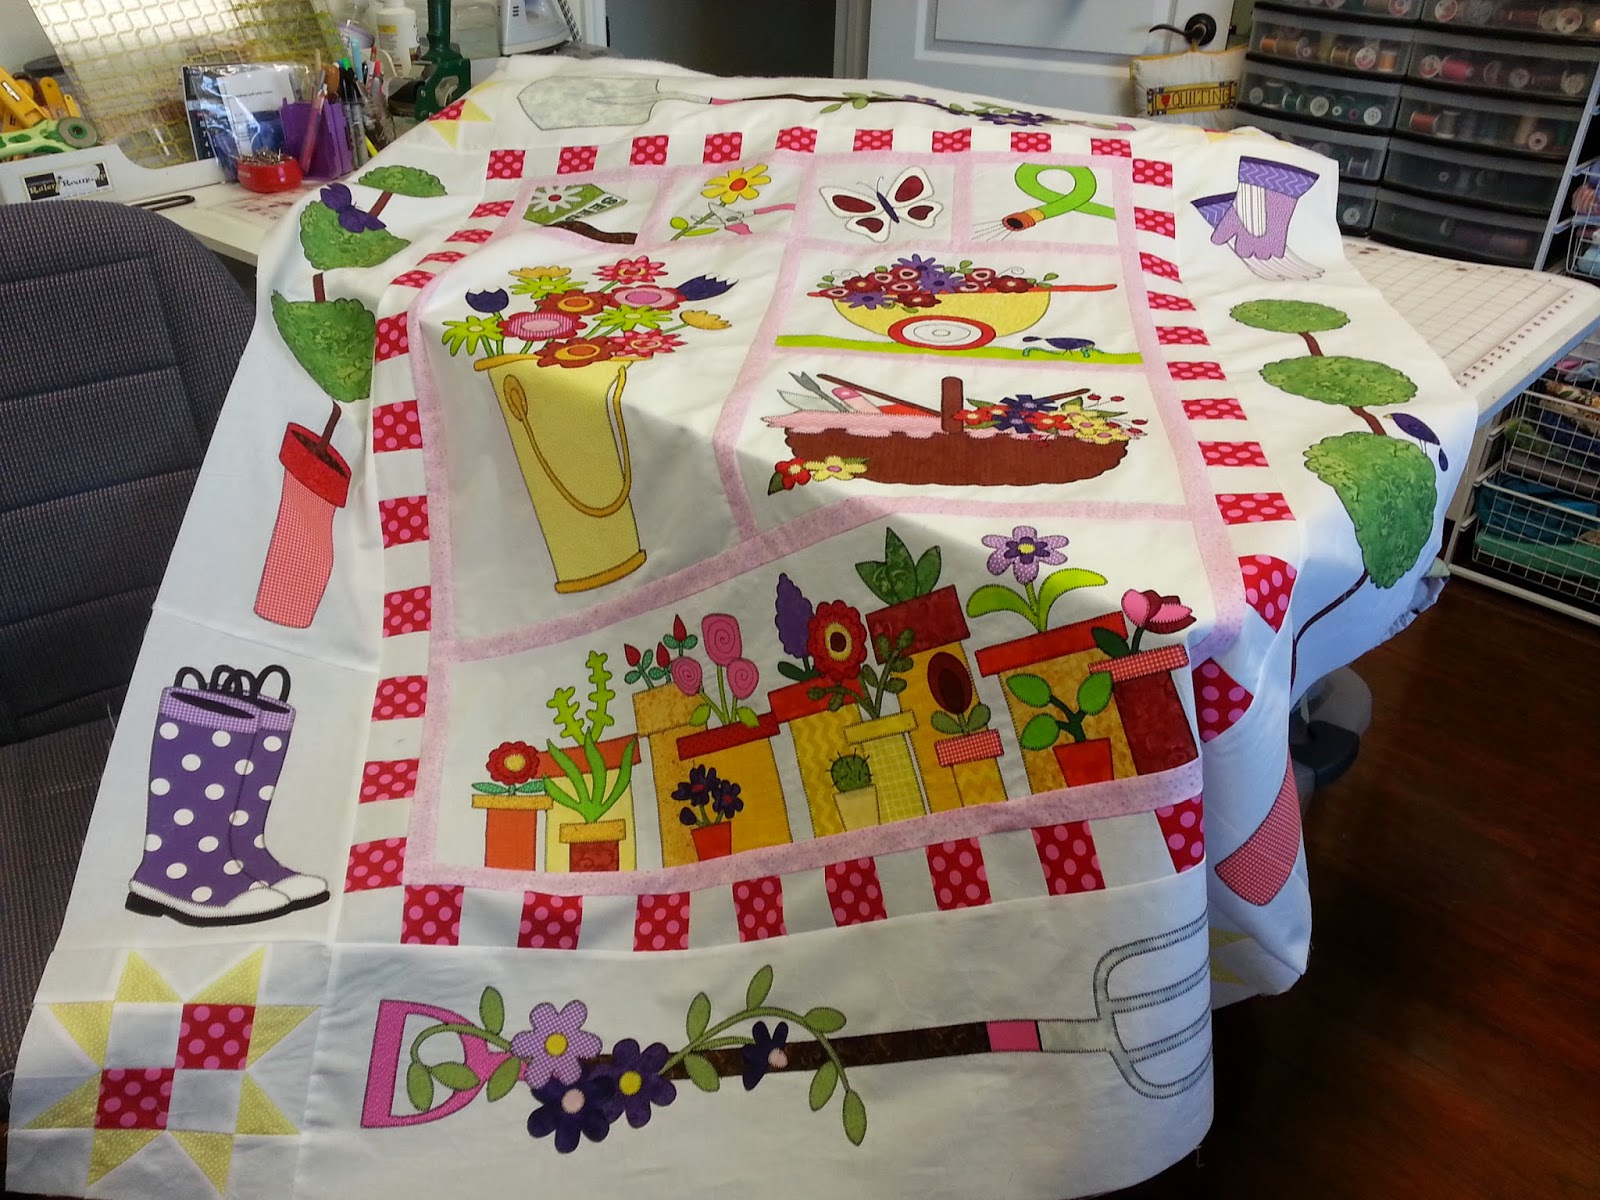
My Garden quilt top is ready to be quilted! I've worked on it every chance available last few days.
This is such a cute quilt. Next step is to audition a few quilting ideas and then load it onto my A-1 Elite Platinum long arm. Will be using two layers of batting. Top layer will be a white batting so the top stays "White". Anxious to get it done as the weather is warming up and outside is calling me!
Saturday, February 28, 2015
Garden Quilt Project
This is my winter project. I'm combining my love of gardening and quilting together! One of the blocks took me 6 hours of tedious E's (appliqué stitching). I just love the vibrant colors and cute designs. Trying to get it finished, one more block to go. Then I can work on the sashing and put it all together. I am excited to quilt this as I already have a good idea what to do on it. I will have to use a white batting as the background is so very white. Stay tuned for more pictures soon. 

Monday, February 23, 2015
Callies Quilt
Callie brought me her third quilt to finish on my long arm. I am impressed with how straight her borders are. They were perfectly straight and layed smooth. All her seams were nicely pressed too! Way to go Callie! The first picture is the before picture. Don't you just love before and after pictures? 

This is the back. So yummy looking! Backing is muslin with a mocha sew fine thread throughout. Batting used is Hobbs 80/20. The inner design is Feathered Curls. The outer border is Gaylana Feather Border. The inner border was finished with ruler work. I stitched in the ditch around the borders for definition. Callie choose three different threads. A different color for each section. Turned out great!

The finished quilt. She just has to stitch down the binding to the back. Binding is the same as the inner border. Enjoy your quilt Callie. I enjoyed quilting it. 

Subscribe to:
Posts (Atom)